How to Handle Peeling Paint Caused by Gutter Repair Issues
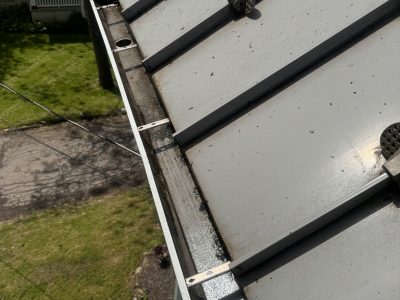
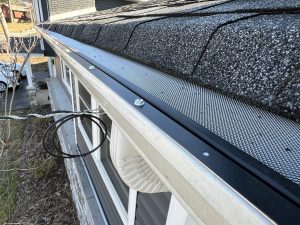
Peeling paint near the roofline is rarely just a paint problem. Most of the time, it is a moisture problem wearing a paint disguise. When that moisture traces back to bad gutter work, the damage tends to repeat until the drainage issue is fixed at its source. I have seen homeowners repaint a fascia board twice in three years, only to watch the new finish bubble and curl after the first hard spring rain. The culprit was not bad paint. It was a gutter section pitched the wrong way, feeding water behind the metal every time the downspout clogged.
That pattern is common. Gutters sit at the edge of the house envelope, and when a repair goes wrong, the effects spread quickly. Water can back up under the shingles, run over the front lip, spill behind the gutter, soak the fascia, and wick into trim, soffits, siding, and even interior framing. Paint is often the first visible warning, but it is almost never the last.
If you are dealing with peeling paint after Gutter Repair work, the right approach is not to scrape and repaint immediately. First, stop the moisture. Then assess how far the damage has gone. Only after the area is dry and stable does a paint job have any chance of lasting.
Why gutter-related peeling paint happens
Paint fails when it loses adhesion. That usually happens because water gets under the film or because the surface beneath the paint has deteriorated. Gutters can trigger both.
A simple example explains a lot. Imagine a section of gutter that was reattached after storm damage. The installer reused old spike-and-ferrule fasteners and pulled the gutter tight to a fascia board that was already soft from years of wetting. At first glance, it looked serviceable. But the gutter developed a slight reverse pitch, meaning water no longer flowed consistently toward the downspout. During moderate rain, water pooled, overflowed at one corner, and sat against the painted trim for hours at a time. Within a season, the paint blistered. Within two seasons, sections of wood had started to rot.
That is the chain reaction you are trying to interrupt.
Poor gutter repairs can cause peeling paint in several ways. Water may overflow because the gutter slope is wrong. It may leak through bad seams or loose end caps. It may run behind the gutter because flashing is missing or because the rear edge of the gutter is set too low against the fascia. Downspouts may dump water too close to the wall, saturating lower trim and siding. Even an oversized bead of sealant can trap debris, creating a clog point that did not exist before.
Climate matters too. In humid regions, painted wood stays wet longer, so even minor leaks can become chronic paint failures. In colder areas, ice can worsen the problem. A gutter that does not drain cleanly may hold water, freeze, and expand. That movement stresses joints and fasteners, opening new leak paths. Then the thaw cycle pushes water into the same vulnerable areas again.
Signs the gutter repair is still failing
One challenge with gutter-related paint damage is timing. You might notice peeling in July, but the repair mistake happened in March, and the worst soaking may have occurred during a single storm you barely remember. That is why it helps to inspect with a detective’s eye.
Look closely at where the paint is failing. Peeling confined to the lower edges of fascia boards often points to overflow or backside leakage. Paint failure concentrated around gutter brackets or old nail holes suggests repeated seepage through penetrations. Staining that runs vertically down siding below a gutter seam can indicate a joint leak rather than general overflow. If the underside of the soffit shows mildew or tan water marks, water may be sneaking behind the gutter rather than simply spilling over the front.
You can often confirm the pattern after rain. Not during a dangerous storm from a ladder, but safely from the ground or from a window. Watch for thin sheets of water running behind the gutter, drip lines forming at one seam, or one section holding water long after the rest has drained. Those clues matter more than the paint alone.
A short field checklist
Use this quick check before you touch a scraper or paintbrush:
- Look for peeling, bubbling, or soft wood near gutter joints, corners, and downspouts.
- Check whether the gutter holds standing water after rain.
- Search for water stains on soffits, fascia boards, and siding below the gutter line.
- Confirm that downspouts discharge far enough from the foundation and away from trim.
- Probe suspicious wood gently with an awl or screwdriver to test for rot.
This is one of those cases where a five-minute inspection can save days of https://caidenjdpk000.keystonescope.com/posts/gutter-repair-vs-replacement-which-is-right-for-you cosmetic work that would fail again.
Fix the water problem before anything else
Homeowners are often tempted to start with the visible mess. Peeling paint looks urgent. Bare wood looks worse by the week. But repainting before the gutter issue is corrected is a waste of labor and materials.
The underlying repair might be small or significant. Sometimes it is as simple as cleaning out packed debris that formed after a repair left an awkward low spot. Sometimes it means rehanging a section of gutter with the proper pitch, replacing failed sealant at seams, adding or correcting apron flashing, or replacing damaged fascia so the gutter can be fastened to solid material. The right remedy depends on what went wrong.
A properly pitched gutter usually drops subtly toward the downspout. The exact amount can vary by installer and system length, but the key is reliable flow without obvious sagging. If one end of the gutter is visibly lower than the rest, that often signals either too much pitch or structural movement. If there is no perceptible fall at all and water lingers after rain, the section probably needs adjustment.
The fastening method also matters. Old spike-and-ferrule systems can work, but they loosen over time, especially in fascia that has seen repeated wetting. Modern hidden hangers generally hold alignment better when installed into sound wood. If the fascia is soft, no fastener will perform well for long. In that case, replacing the damaged wood is not optional. It is the foundation for everything that follows.
Flashing errors deserve special attention. I have seen gutters blamed for leaks that were actually caused by missing drip edge. Without proper flashing, water can curl back under shingles and run onto the fascia, where it eventually pushes paint off in strips. The gutter may be innocent, but the repair still has to address the roof edge detail or the problem will continue.
How to assess the paint and substrate after the repair
Once the drainage issue is corrected, give the area time to dry. How long depends on weather, sun exposure, and how saturated the material became. A lightly damp fascia board in warm, breezy weather may dry in a few days. Thicker trim or shaded soffits can take much longer. If you paint too soon, trapped moisture will telegraph through the new coating.
This is where patience pays. If you own a moisture meter and know how to use it, it can help guide the decision, especially on wood trim. If not, visual and physical cues still tell a lot. Sound wood feels firm. Damaged wood feels punky, fibrous, or spongy. Old paint that is still well bonded can often stay. Loose paint has to go.
Do not assume that every flaked area needs full replacement. There is a judgment call here. If the wood is solid, the profile still holds clean edges, and the damage is surface-deep, scraping, sanding, priming, and repainting can be enough. If corners crumble under light pressure, if the wood face has split deeply, or if fastening points are no longer reliable, replacement is the better long-term choice.
This is also the moment to ask whether the original paint system was appropriate. Exterior trim near gutters lives in a wet zone. It benefits from high-quality primer and paint, not bargain products chosen for color alone. The difference in labor between cheap and premium coatings is negligible. The difference in service life can be substantial.
Preparing the surface the right way
Surface preparation is where durable repainting is won or lost. For gutter-related failures, this step deserves more care than homeowners usually expect.
Start by removing all loose, lifting, or blistered paint. A pull scraper works well on broad fascia boards. Narrow trim may need a detail scraper. Stop scraping when you reach sound paint with firm adhesion, not when everything looks perfectly uniform. Trying to remove every trace of old paint often causes needless damage. What matters is creating a stable surface.
After scraping, feather the edges with sandpaper so the transition between bare substrate and intact paint is smooth. This does two things. It improves adhesion and reduces the visible ridge line that often telegraphs through the finish coat. On rough-sawn or heavily weathered wood, perfection is unrealistic, but abrupt paint edges should still be softened.
Clean the area before priming. Chalk, dust, mildew, and pollen interfere with bonding. In some cases a mild detergent wash is enough. In others, especially where mildew formed under chronic dampness, a proper cleaning solution is warranted. Rinse thoroughly and let the area dry fully before moving on.
Bare wood, exposed filler, and suspect spots need primer. This is not the place to skip steps with a so-called paint-and-primer shortcut. A dedicated exterior primer helps seal porous fibers, lock down residual staining, and build a better surface for topcoat adhesion. If water stains are severe, choose a primer suited to stain blocking. If the trim is metal rather than wood, use the primer designed for that substrate.
When replacement beats repair
Some trim can be salvaged. Some cannot. The line is not always dramatic. Homeowners expect rot to look black and catastrophic, but much of it starts as subtle softness and repetitive paint failure.
If the fascia board supports gutter fasteners and has lost structural integrity, patching is usually false economy. You may restore the appearance for a season, but the new coating will be stressed again by movement and recurring moisture. Replacement gives you a clean, sound base and lets the gutter be rehung properly. That can solve two problems at once.
Matching profiles is sometimes the trickiest part, especially on older homes. This is where an experienced carpenter earns the fee. A replacement board that is dimensionally wrong can create a ripple effect at the soffit line or reveal gaps that were not there before. The goal is not just fresh material, but restored geometry so the gutter sits correctly and drains cleanly.
Engineered trim products can perform well in some locations, but they are not a cure-all. If the edge detail is exposed and the material remains chronically wet, even rot-resistant products can swell, delaminate, or lose finish prematurely. Good water management still matters more than the product label.
Repainting for longevity, not just appearance
After repairs and prep, repainting should feel straightforward, but the order and timing still matter. Paint in favorable weather, not on a rushed schedule. Surfaces should be dry, temperatures should sit within the coating manufacturer’s recommended range, and direct hot sun should be avoided when possible, especially on dark colors that skin over too quickly.
Apply primer where needed, then finish with a quality exterior paint suited to trim. Brush application remains the standard for many fascia and soffit details because it works paint into the grain and along edges more effectively than casual spraying. Spraying can produce excellent results, but only when paired with disciplined masking and back-brushing where needed. On many homes, careful brushing is simpler and more forgiving.
Color choices have practical consequences. Very dark trim can absorb more heat, which increases expansion and contraction. That does not mean dark paint always fails, but it narrows the margin for error on marginal substrates. Lighter colors often weather more gently on sun-exposed trim near rooflines.
Pay extra attention to end grain if any is exposed. End grain drinks in moisture quickly and often becomes the first failure point. A well-primed and well-painted edge can add years to a trim repair.
A sensible repair sequence
If you want a reliable order of operations, follow this sequence:
- Diagnose the exact gutter-related water path, whether overflow, seam leak, poor pitch, or backside runoff.
- Correct the Gutter Repair issue fully, including fascia or flashing work if those components are compromised.
- Let affected materials dry, then remove failed paint and evaluate the substrate for rot or softness.
- Replace or repair damaged trim, clean the surface, prime appropriately, and repaint with exterior-grade coatings.
- Monitor the area through the next few rain events to confirm the fix is working before calling the project finished.
That last step gets overlooked. A repair is not proven on the ladder. It is proven during weather.
Common mistakes that shorten the life of the fix
The most common mistake is treating peeling paint as a standalone maintenance issue. It is not. If the moisture source remains active, even a meticulous paint job will fail. A close second is underestimating hidden damage. Paint can peel from a board that still looks mostly intact, yet the back side may be wet repeatedly because water is running behind the gutter. By the time the face shows failure, the substrate may already be compromised.
Another mistake is using too much caulk as a substitute for proper detailing. Caulk has its place around trim joints, but it is not a structural water-management system. When installers try to solve drainage design problems with sealant alone, they usually create maintenance headaches. Water finds the next weak point.
Pressure washing is another risk area. Used carelessly, it can force water behind paint and into soffits, making the moisture problem worse. For delicate trim and suspect paint, gentler cleaning methods are safer.
Then there is the timing problem. Many exterior projects get squeezed into a short weekend, which leads to painting over damp surfaces or recoating before primer has cured adequately. These shortcuts often look fine for a month. They do not look fine after a freeze-thaw cycle or a humid summer.
Special cases that call for closer judgment
Not every paint failure near a gutter is caused by the gutter alone. Roof leaks, failed flashing higher up, ice dams, condensation in poorly ventilated soffits, and even sprinklers hitting lower trim can produce similar symptoms. If peeling extends beyond the gutter line in odd patterns, or if you see interior staining in the attic or top-floor ceilings, broaden the investigation.
Historic homes need special care. Older wood can be dense and durable, but it may also carry many paint layers, including lead-based coatings on pre-1978 houses. That changes how scraping and prep should be handled. Disturbing old paint without proper containment and safety measures is a health risk, not just a workmanship issue.
Homes near the coast present another wrinkle. Salt exposure accelerates wear on metal components and can degrade some finishes faster. In those settings, material selection for both gutter hardware and paint becomes more important, and maintenance intervals may be shorter even when the repair is done well.
When to call a professional
There is a reasonable amount a skilled homeowner can do, especially on a one-story section with clear access and minor surface damage. But many cases justify professional help. If the affected area is high, if the gutter pitch needs resetting, if fascia replacement is involved, or if you suspect flashing defects, it makes sense to bring in someone who handles roof edge details regularly.
A good contractor should be able to explain not just what failed, but how water was moving and why the previous repair did not hold. That explanation matters. It separates real diagnosis from guesswork. Ask what will change physically after the repair. Will the slope be corrected? Will hangers be replaced? Will drip edge be added or extended? Will damaged wood be replaced rather than patched? Clear answers usually signal competent work.
If painting is included, ask about prep, primer, and drying time. Vague promises about "sealing it up" are not enough. Moisture problems demand specifics.
Keeping the problem from coming back
Once the repair is complete and the paint has cured, prevention becomes the main job. Gutters need routine inspection, especially after major storms, heavy leaf drop, or winter freeze cycles. That does not mean constant fussing. It means paying attention before a small drainage defect becomes trim damage.
A house with mature trees may need more frequent cleaning. A home with long gutter runs may need careful monitoring for sagging over time. Splash blocks or downspout extensions should stay in place and direct water away from walls and foundations. If you had one section fail before, make that area part of your seasonal walk-around.
The useful mindset is simple. Paint is a finish, not a waterproofing strategy. Gutters are a drainage system, not decoration. When the drainage system works, the finish has a fighting chance. When it does not, the paint tells you first, and the wood tells you next.
Handled properly, peeling paint caused by Gutter Repair issues is fixable. The lasting repair comes from respecting the sequence: diagnose the water path, correct the gutter fault, let materials dry, restore damaged surfaces, and then repaint with care. That approach is slower than a cosmetic patch, but it is the one that keeps you from doing the same job again next year.
Just Gutters LLC
262 Main St
Hackettstown, NJ 07840, United States
Phone: +1 201-331-9454
FAQ About Gutter Repair
Is it cheaper to repair or replace gutters?
Repair can cost less when damage is limited and the remaining system is sound. Replacement may offer better value when leaks, corrosion, or repeated failures affect several sections. An inspection and written estimate can help compare the options.
Can damaged gutters be repaired?
Many localized problems, including leaking joints, loose brackets, sagging sections, and damaged downspout connections, can be repaired. The best approach depends on the material, extent of damage, and condition of the mounting surface.
Can I repair gutters myself?
Simple ground-level checks may help identify a problem, but roof-edge work carries fall risks and may require specialized tools. Professional assessment is advisable for high gutters, loose sections, hidden wood damage, or uncertain drainage problems.